
Write us to: sales@volgsol.com

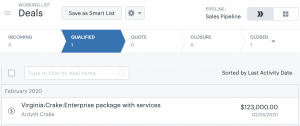
A sales pipeline is a mechanism or workflow that explains or elaborates the progress of deals in the form of steps in Zendesk Sell. This sales pipeline’s progress is broken down into different steps such as Prospecting, Qualified, Quote, Closure, and Closed. Moreover, users with admin privileges can re-edit or delete existing stages and create custom stages to understand the deals’ progress better.
Let us see how to work with sales pipeline stages in Zendesk Sell.
How to customize existing stages and add custom stages in the sales pipeline?
Navigate to the following path:
Settings > Customize > Sales Pipelines.
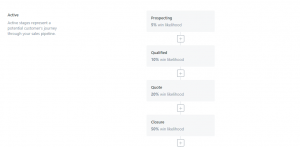
1. If you want to Edit or Delete the pre-created stages hover your mouse over them and click on the Pencil icon for editing and the Bin icon for deleting existing stages.
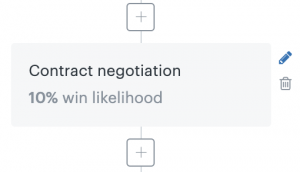
2. To add a new stage, click on the Add (+) icon between the existing stages where you want to add.
3. As you click on the add icon, enter the data in both required fields, such as the Name of the stage you will create and the Percentage of win likelihood.
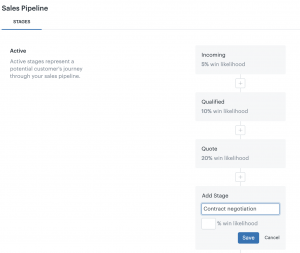
4. After inputting the data in the fields, click on the Save button.
Here we learned how to edit or delete existing stages and create new ones between the existing ones.
For further queries regarding Stages in Sales Pipelines of Sell, please leave a comment below.


