
Write us to: sales@volgsol.com

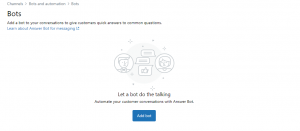
What is Chatbot?
A chatbot is an immediate conversation between the customer and the system without involving the agent. The agent involves only when needed. We can say a chatbot is AI (Artificial Intelligence) based tool.
You can design chatbot conversations on your customers’ most used channels like as; Whatsapp, Web widget, Twitter, Messenger, etc., without coding skills.
How to create Chatbot?
First, we have to enable Agent Workspace by navigating this path:
Admin Center > Workspaces > Agent Workspace, and follow the steps:
1. Enable Turn on Agent Workspace, and Save it.
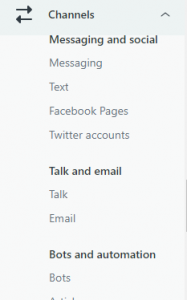
2. Now, go to Channels in the Admin center, the “Messaging” option under Messaging and social, and the “Bots” option under Bots and automation will be displayed.
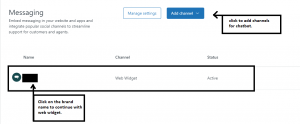
3. Click on the Messaging. Here your brand name will be displayed. If you want to initiate your chatbot with a web widget, then click on it.
4. Or if you want to use some other channels, you can select them by pressing Add Channel button. A drop-down list of channels will be shown. Select whatever you want, and continue.
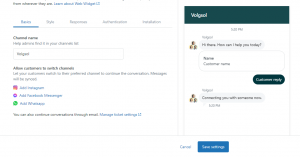
5. As you click on the channel name, you will have multiple tabs for altering the chatbot, i.e.; Basics, Style, Responses, Authentication, and Installation according to requirements.
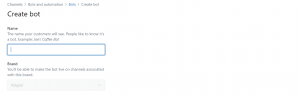
6. Now, click on the Bot under Channels, and press the Add bot button.
7. Add the bot Name you want to show to your customers, and press Create bot button.
8. Click on the Standard responses tab to customize the bot greeting message.
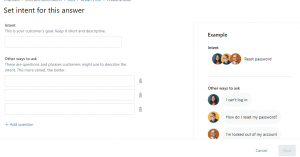
9. Click on the Answers tab then, press the Create Answer button.
10. Give the intent of the customer in the Intent field. This is your customers’ frequently asked questions keyword, then press the Next button.
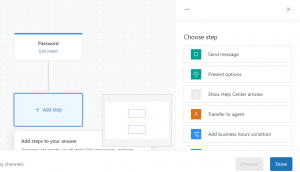
11. Here, add further steps to display the messages to your customers by clicking on Add Step.
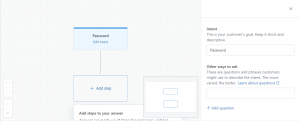
12. You can Transfer the chat to an agent, Add articles, Add business hours and make API Calls by clicking on Add step. Then press the Done button.
13. To test the chatbot, navigate to Messaging under Channels, press the brand name, and click on the top of the right Test it now. A new window will be opened where you can test your chatbot.
14. Click on the Installation tab in Messaging and enable the Add to Help Center and Save settings. This will install your chatbot to your help center.
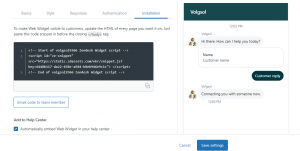
15. Now go to your help center, and a small message icon will be popped up at the bottom of the page, select it and start your conversation.
16. As your chat is transferred to an agent, your ticket will be created in Zendesk.
For further queries related to chatbots, please leave a comment below.


