
Write us to: sales@volgsol.com

As we know, Zendesk, as a CRM platform, has fully customizable properties in all its products. Creating custom attributes in Zendesk Explore is also such flexible property. During creating reports in Explore, we have some
pre-defined attributes which help agents to create reports, but sometimes we need some extra or custom attributes which help to create a report with exact calculations.
Here we will see how to create a custom attribute that returns the number of tickets from each channel and returns a value like “Big” or “Small” depending upon the number of tickets in Zendesk Explore.
Creating custom calculated attribute in Explore:
Navigate to the following steps in Zendesk Explore to create custom attributes:
1. Open Explore from the products menu.
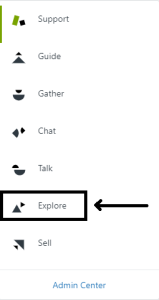
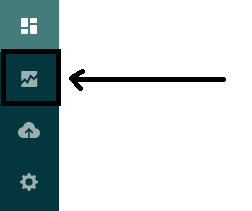
2. Click on the Reports icon from the sidebar.
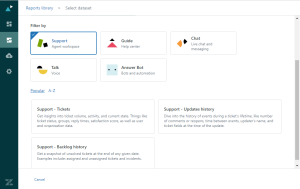
3. Select the Support-Ticket on the dataset page.
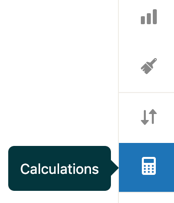
4. Open the Calculations menu from the sidebar right of the page.
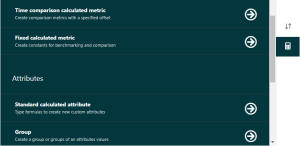
5. Now, select the Standard calculated attribute option from the menu in the Attributes section.
6. Enter the Name of the attribute you are creating, like as Ticket channel Big or Small?
7. Enter the Formula in the field below. You can select the fields by writing their names here or selecting the Fields from the drop-down list below.
8. Add the Functions by clicking on the button.
9. Explore will help you in writing the formula as you write IF. The system will show you the complete formula format.
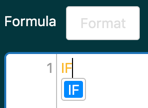
10. The Explore will complete the formula independently, and you can also edit it.

Tip: Ignore the red error text because we still need to  complete the formula. Once it is
completed, it will be turned into a green tick.
11. Now, replace the _boolean_condition placeholder with COUNT function. As you type the COUNT, you will see all the functions that contain the COUNT function. Click COUNT(Tickets) to add this function to your formula.
![]()
12. Now, add the condition to check whether the number of tickets returned value is larger than 10 or not. To do this, enter >10 after the boolean condition you entered yet, like (COUNT(Tickets)>10).
![]()
13. The main thing of creating a custom attribute is to replace the _value_if_true and _value_if_false placeholders with the results you require to return. To do this, replace the _value_if_true with Big and _value_if_false with Small.
14. The formula has been completed, and now you have to select the field from which the whole data pass and will ensure that tickets are only counted based on the below field. To do so, select the Ticket channel from the Computed from the drop-down.

15. Review all the formula you made and click on the Save button to update the Explore with their settings on your Zendesk account’s server. And it will be visible in the Rows and Columns of the report builder.
Testing the custom calculated attribute:
Let us see if it is working perfectly or not by navigating to the following path.
1. Firstly, create a report builder for the new report using the Support: Tickets dataset.
2. Select the Tickets in the Metrics section.
3. Now, click on the Add button in the Rows section.
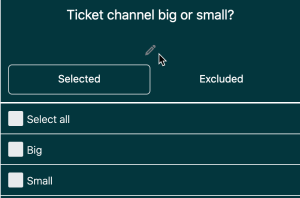
4. Click your standard calculated attribute in the calculated attributes section that is the Ticket channel big or small?
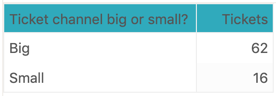
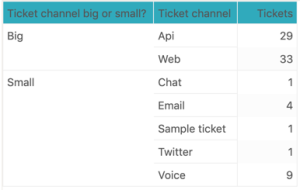
Explore shows the number of tickets associated with “Big” channels (with more than ten tickets) and “Small” channels (with ten or fewer tickets).
5. For complete understanding, you can make it more clear by adding a Ticket channel attribute in the Rows section, and it will look like this:
We hope it will be cleared to you. Remember to Save the report before moving on.
Editing the custom created attribute’s formula:
1. Open the previously saved report section.
2. Click on the standard calculated attribute you applied in the previous report, Ticket channel big or small?
3. Click the Edit calculation button in the attribute filter window, as shown in the screenshot below.
4. The standard calculated attribute panel will display your formula, make the necessary changes, and Save it.
Here we saw the creation, testing, and editing of the custom attribute in Explore. For further queries regarding the Managing Custom Calculated Attributes in Explore, please leave a comment below.


