Write us to: sales@volgsol.com

Agent status shows the agent’s interactivity with workspaces or customers. It also shows what type of activity an agent performs with the customers. Some default statuses are available in the Zendesk system, i.e., Offline, Online, Away, and Transfers only. However, sometimes agents need some customized statuses, which can be created in the admin center by agents or admins themselves. Zendesk authorities have introduced this new feature in the Zendesk. Agents can name customized statuses according to their will or need, such as Do Not Disturb, Unavailable, Busy, and Ready.Let us see how to configure the custom statuses of agents.
How to configure custom agent statuses?
Here we will see how to create and work with such statuses.
Navigate to the following path:
Admin Center > Objects and rules > Omnichannel routing > Agent statuses.
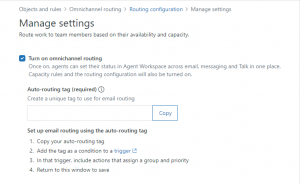
1. If you want to apply and show custom statuses you are creating on your workspace, Turn on the omnichannel routing by clicking the button on the top right of the page.
![]()
2. Apply the following settings to turn on omnichannel routing. And Save it.

3. If creating these custom statuses for the first time, you can check the details of pre-created statuses by clicking on the options icon. It will enhance your knowledge and give you an idea of how the statuses work and are created.

4. Click the Create agent status button to create a new status.

5. Enter the Name of the status that is required and the Description also that is optional but should be vivid.

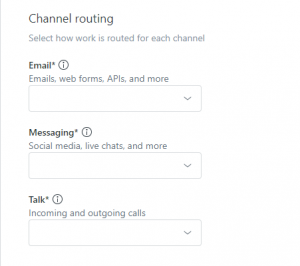
6. In the Channel routing section, provide the Conditions based on each channel (Email, Chat, and Talk).

7. Remember that appearance of status is non-customizable. The Preview section will show how the custom status is created yet will be displayed on the workspace. Check all the settings you made for custom status and click on the Create agent status button.

Here the agent’s status is created and ready for execution.
For further queries regarding Custom Agent Statuses in Zendesk, please leave a comment below.


