
Write us to: sales@volgsol.com

Triggers are the automated set of actions that execute multiple times in Zendesk Sell when the leads, contacts, and deals meet described conditions in triggers. You can perform many actions after updating the leads, contacts, and deals in Sell, such as changing owner, stage, currency type, and many others. Triggers reduce the team members’ efforts and manual work because once activated, and it works automatically. Here we will discuss the working and creation of triggers.
How to create triggers in Sell?
Navigate to the following path:
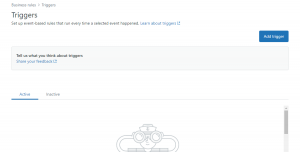
Settings > Business rules > Triggers.
1. You can Edit pre-created triggers here by clicking on them.
2. Click on the Add trigger button to create a new trigger.
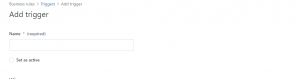
3. The system will take you to the following next page.
4. Provide the Name of the trigger, and it is required, and enable the Set as active if you want to keep this trigger active from now. Otherwise, leave it unchecked.
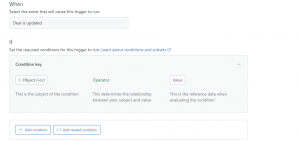
5. Select the Events under the When the event section (which means the trigger will fire when an event occurs on the lead, contact, deal, whatever you want).
6. Add the conditions that will help trigger execution. You can add the Simple or Nested conditions (the set of conditions in parentheses that execute together).
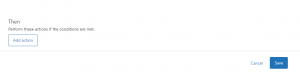
7. Now, here is the last and main part of building a trigger, which is adding actions. Select the Actions under the Then section (what should be happened after the conditions’ meetup). These actions should be performed by the triggers on behalf of team members. Moreover, remember to Save it.
Here was the brief but complete and understandable discussion about the triggers in Sell.
For further queries regarding Triggers in Zendesk Sell, please leave a comment below.


